Installation guidelines
Procedure:
This application can to be installed and run from any shared network folder i.e. “V:\DotNetApps\eBoard”. If you don’t already have a shared network drive mapped as “V:\”, please create one before proceeding with the installation and make sure it is accessible by the authorized users within your organization. Once you are in the “V:\” drive, create a New Folder and call it “DotNetApps”.
Note: some antivirus software might interfere with this application. To avoid this situation, you will have to change the settings of the antivirus. Here is an example:
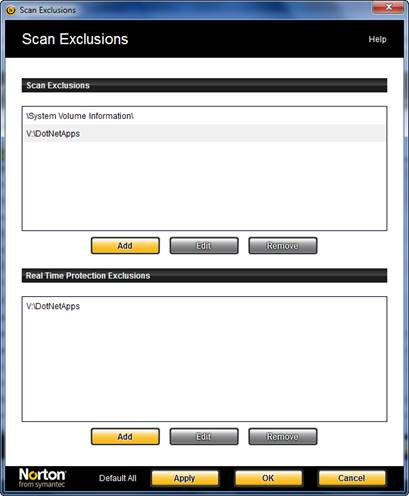
-
Within the DotNetApps folder, create another folder and call it BMS-eBoard and within this last one, another one calling it Backups
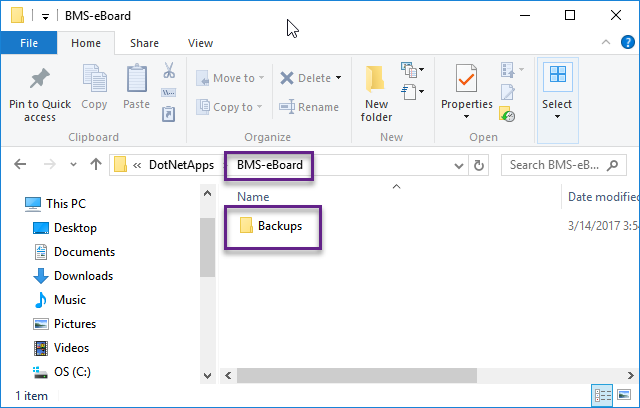
-
Verify that you and the users that will run this app have access to “V:\DotNetApps\BMS-eBoard”.
-
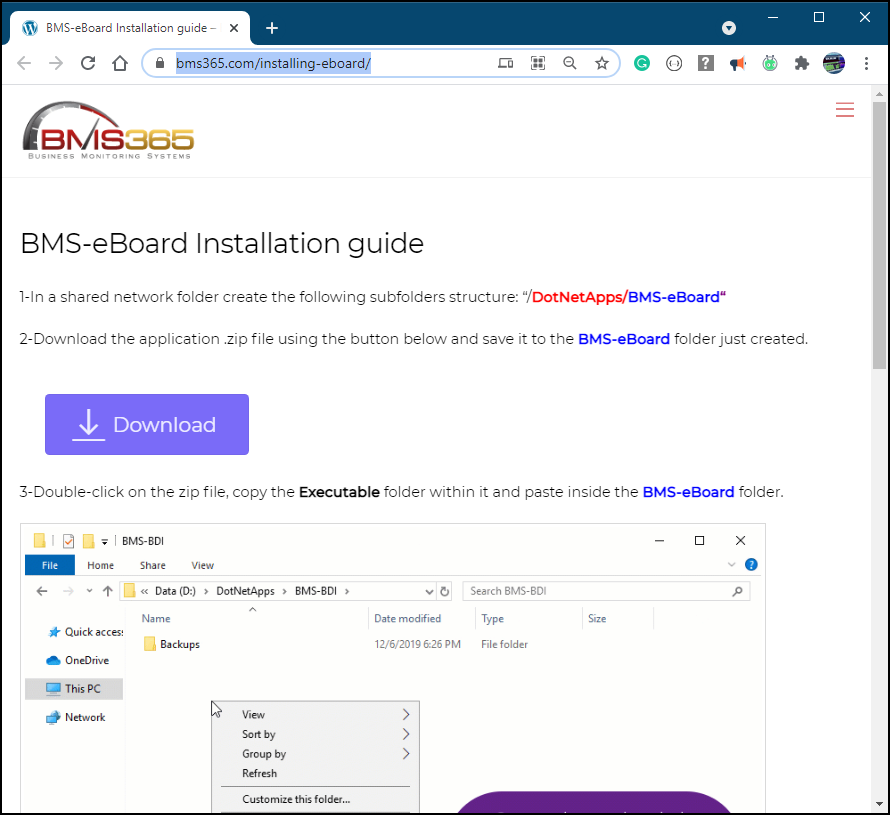
Go to: https://bms365.com/installing-eboard/ and download the zip file containing the app within the folder just created.
-
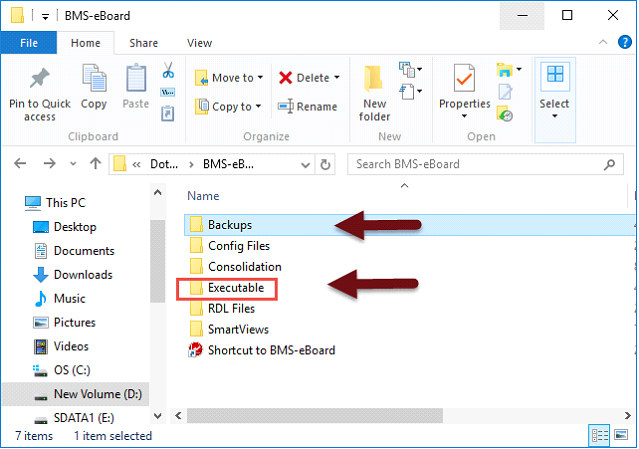
Double-click on the zip file, copy the Executable folder within it and paste within the BMS- eBoard folder (just one lever above the Backups folder)
-
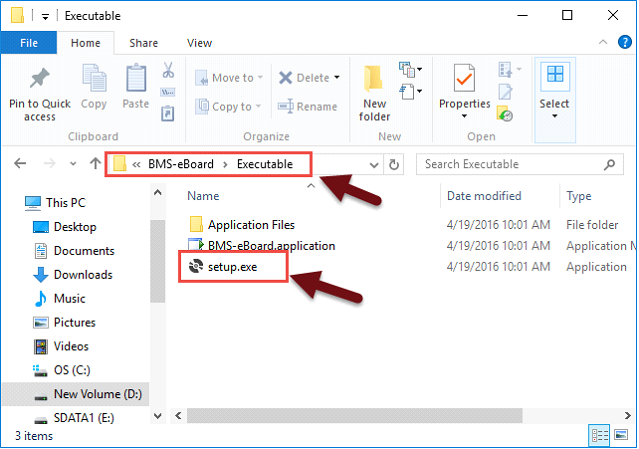
Go inside the Executable folder and double-click on setup.exe.
-
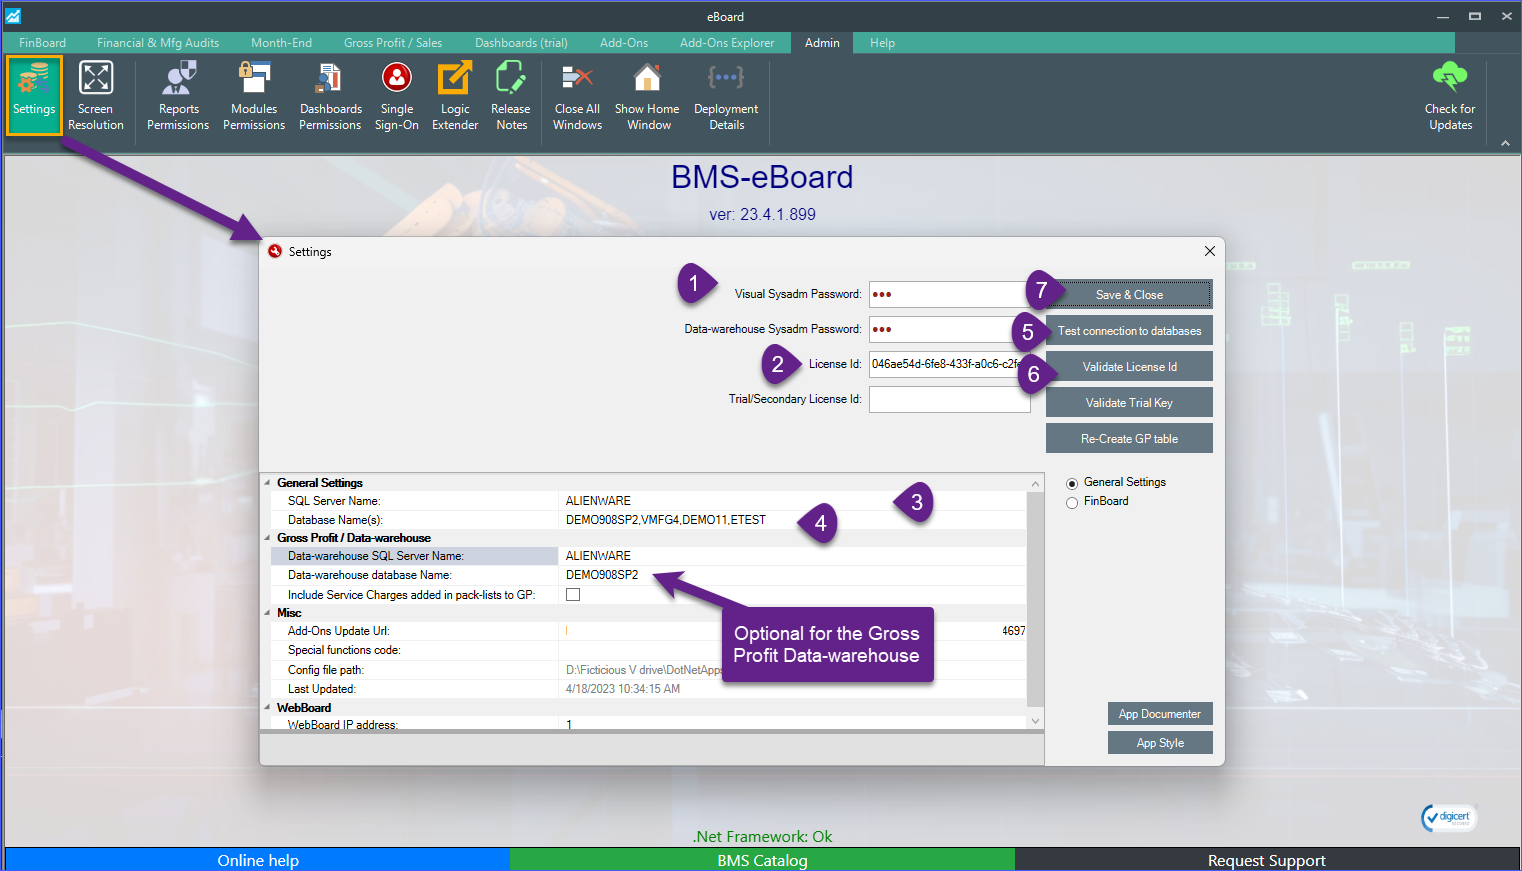
Follow the instructions provided the by app
-
Enter the following key provided under the Subscription Id:
-
Test the connection to the database
-
Save the changes, completely exit the app and then re-launch it.This application is Read – Only and it is not capable of modifying any data in the Visual Database.