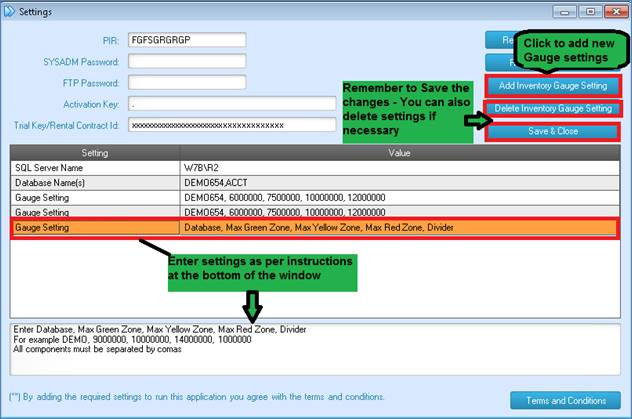
Gauge Settings
How to add gauges
1. Log into the Backdated Inventory app as Sysadm, click on the Admin Module and select Settings.
2. The Settings window will open up. Click on “Add Inventory Gauge Setting”
3. A new row will be added to the grid.
4. Enter the database name, zone thresholds and divider as per instructions displayed at the bottom of the window. Example: YOUR-DATABASE-NAME, 5000000, 7500000, 10000000, 1000000 where 5000000 is the top limit of the green zone that reflects acceptable inventory levels, 7500000 is the top limit of the yellow zone indicating a warning that inventory levels are over the acceptable threshold and should be monitored, 10000000 is the top limit of the red zone indicating that inventory levels are unacceptable and should be looked after, and 1000000 is the divisor.

5. Click Save and close.
6. If necessary, you can remove the Gauge settings by clicking on “Delete Inventory Gauge Settings”.
